
We all have that one friend who can braid like their hands were blessed by the braid gods. Meanwhile, you’re over here making something that looks like a tumbleweed on vacation.
The truth is, how to braid hair like a pro isn’t some mystical gift — it’s a mix of good technique, practice, and knowing the little details that make a braid look flawless instead of “DIY in the dark.”
This guide is for people who want braids so neat they look fresh out of a salon — without paying salon prices. You’ll learn how to prep hair for perfect grip, master clean parting, keep even tension, and finish with that professional polish that makes people ask, “Who did your hair?”
We’ll cover the core braid types, tricks stylists swear by, and how to adapt your braids for different hair textures. By the end, you won’t just be braiding — you’ll be braiding like it’s your side hustle.
Get your comb, your product, and your confidence. Let’s make your braids so good even you won’t believe you did them.
How to Braid Hair for Kids (Without Tears, Bribes, or Running Away)
How Often Should You Wash Your Hair Based on Your Hair Type
How to Cut Your Own Hair at Home (With Nothing But Scissors and a Dream)
The Secret to a Pro Braid? Prep Work
Here’s the thing about how to braid hair like a pro — it doesn’t actually start with braiding. It starts with what you do before your fingers even cross a single strand. A clean, well-prepped canvas is the difference between a braid that looks sleek and one that looks like it’s already halfway undone.
Clean, Detangled Hair
Pros don’t fight with knots — they avoid them. Always start with clean hair, whether you’re working with freshly washed locks or at least giving the scalp a good refresh with a dry shampoo or cleansing spray. Then, detangle from the ends upward using a wide-tooth comb or detangling brush. This makes the braiding process smoother, prevents breakage, and keeps your sections neat.
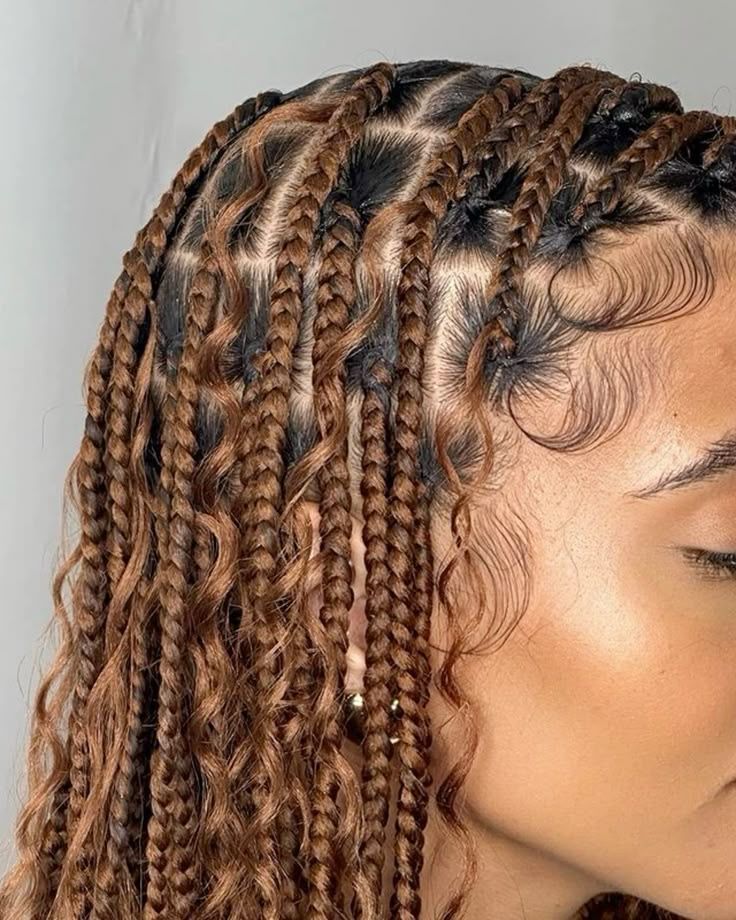
The Perfect Parting Technique
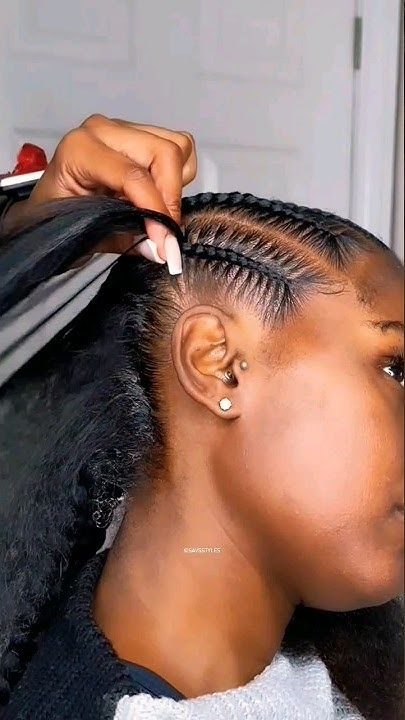
Nothing says “pro braid” like razor-sharp parts. Use a rat-tail comb for precision, and decide on your parting pattern before you start. Straight lines for box braids? Clean diagonals for a creative look? Whatever you choose, commit to it. A good trick is to lightly mist the part with water or a styling spray and run the comb through again for an extra crisp finish.
Choosing the Right Products for Grip and Shine
Slippery hair is the enemy of a neat braid. Use a product that adds grip — like a lightweight styling cream, mousse, or braiding gel — to help the strands stay put as you work. For extra shine and a polished finish, lightly smooth a serum or oil over the completed braid. The right products not only make braiding easier but also keep the style looking fresh for days.
When you master the prep stage, you’re already halfway to figuring out how to braid hair like a pro. Clean, detangled strands, perfect parts, and the right grip products turn your work from “good effort” to “did a stylist do this?” — and that’s before you’ve even started weaving.
Braid Types Every Pro Knows
If you want to master how to braid hair like a pro, you’ve got to know the classics. These are the foundation styles that every stylist — and every “fake it ‘til you make it” braider — should have in their arsenal. Once you nail these, you can adapt them to any hair type, length, or occasion.
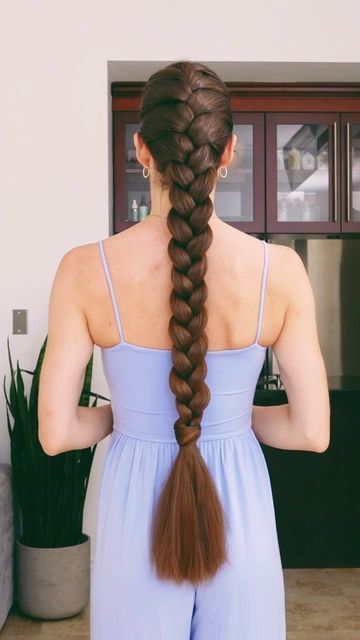
Three-Strand Braid
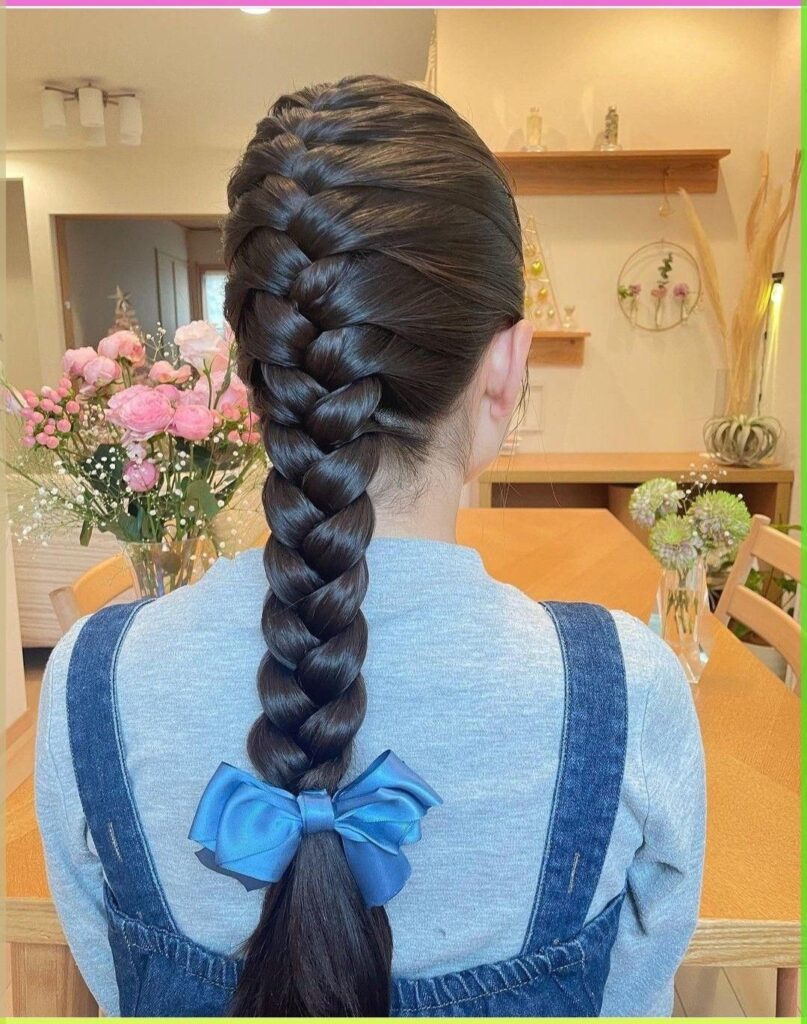
The bread-and-butter of braiding. You divide the hair into three equal sections, then cross the right over the middle, left over the middle, and repeat. It’s simple, quick, and forms the base technique for many other braids. The trick to making it look professional? Keep your tension even from start to finish.
French Braid
A French braid is essentially a three-strand braid with hair added in as you go. Start at the crown, braid a few stitches, then add a small piece of hair from each side before crossing over. Continue until you reach the ends. This style sits close to the scalp and works beautifully for sleek, polished looks.
Dutch Braid
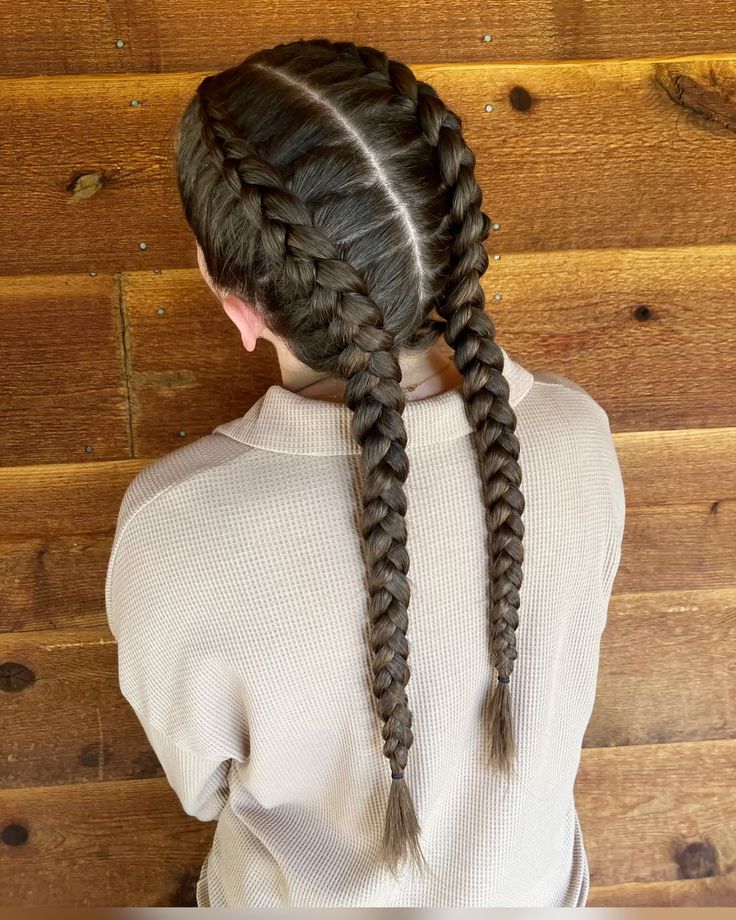
Think of the Dutch braid as the French braid’s bold cousin — instead of crossing over, you cross each strand under the middle. This makes the braid sit on top of the hair for a more defined, 3D effect. It’s perfect when you want your braids to stand out rather than blend in.
Fishtail Braid
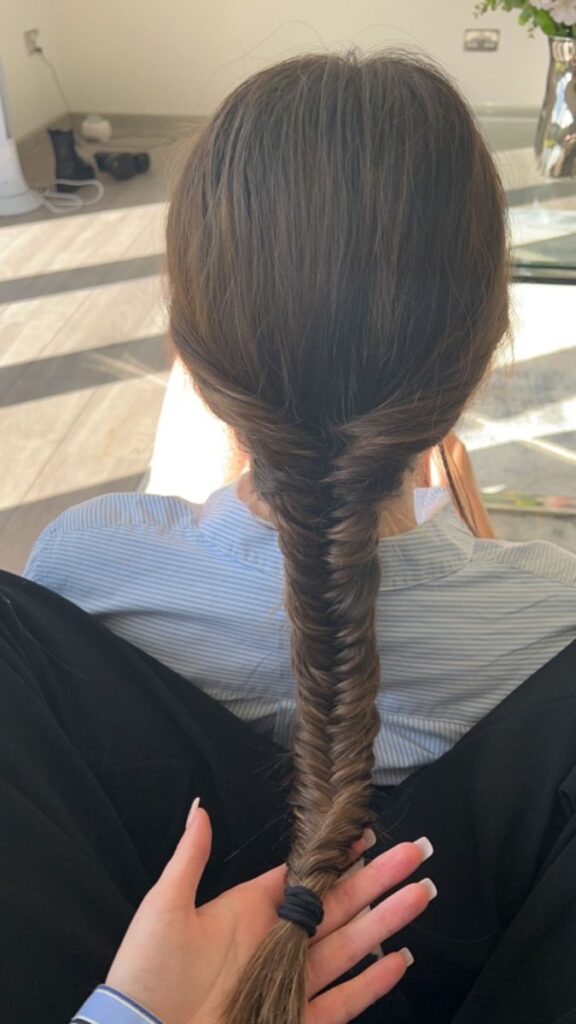
The fishtail looks complicated but is surprisingly simple once you get the rhythm. Divide hair into two sections, take a thin piece from the outside of one section, and cross it over to join the other side. Repeat from alternating sides. The result? An intricate, textured braid that screams “professional” without needing a salon chair.
Learning these four braid types is like learning the ABCs of how to braid hair like a pro — once you’ve got them down, you can write any braid story you want.
How to Braid Hair Like a Pro for Different Textures
One of the real secrets to how to braid hair like a pro is knowing that hair texture changes everything. The same braid can look completely different — and last a totally different amount of time — depending on whether the hair is straight, wavy, curly, or coily. Pros don’t fight texture; they work with it. Here’s how.
Straight Hair: Grip Products, Light Tension
Straight hair is gorgeous but often slippery, which means braids can loosen quickly if you’re not careful. Start by adding a light styling cream, mousse, or braiding gel to give the strands grip. This keeps them from sliding apart as you work. Use light to medium tension — too loose and the braid falls flat, too tight and you risk creating visible bumps or pulling at the scalp. Finish with a dab of serum on the braid to keep it sleek without making it slippery again.
Wavy Hair: Damp Braiding, Frizz Control
Wavy hair has a natural texture that gives braids body, but frizz can creep in if you’re not prepared. Lightly dampen the hair before braiding — this helps control flyaways and makes sectioning cleaner. Apply a small amount of anti-frizz cream or leave-in conditioner, focusing on the mid-lengths and ends. When you braid, keep your sections consistent in size so the wave pattern doesn’t make the braid look uneven.
Curly or Coily Hair: Moisturize, Stretch Before Braiding
Curly and coily hair is naturally drier, so moisture is key. Start with a rich leave-in conditioner or lightweight natural oil to keep strands hydrated. For a smoother, more manageable braid, stretch the hair first using gentle heat, banding, or blow-drying on a cool setting. Clear, even parting is especially important here — it makes the final style look polished and professional. Keep your tension low to protect the hairline and avoid breakage, especially for kids or anyone with a sensitive scalp.
When you adapt your technique to the hair in front of you, you’re not just braiding — you’re showing you truly know how to braid hair like a pro. That’s the difference between a braid that lasts the day and one that gets compliments for a week.
Stylist Tricks That Level Up Your Braids
If you really want to master how to braid hair like a pro, it’s not just about knowing the steps — it’s about those small, subtle details that make people stop and say, “Wait… did you go to a salon for that?” These are the stylist-approved tricks that take your braids from “good effort” to “Instagram-worthy.”
Keeping Tension Even
Uneven tension is the fastest way to make a braid look messy or lopsided. Pros keep their grip consistent from start to finish so each stitch is uniform. The trick? Don’t pull harder on one side than the other, and don’t relax your grip halfway down the braid. If you’re new, check your work every few stitches and adjust before continuing.
Avoiding Lumps and Bumps
Nothing ruins a sleek braid faster than random bulges along the way. Make sure each section of hair is smooth before you cross it over or under. For added precision, run a fine-tooth comb through the section right before you place it. If you’re braiding textured hair, lightly stretch or smooth the strand with your fingers to keep it consistent.
Perfect Braid Endings
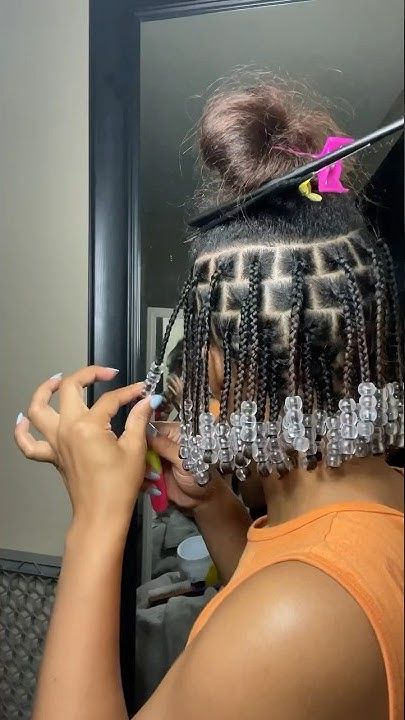
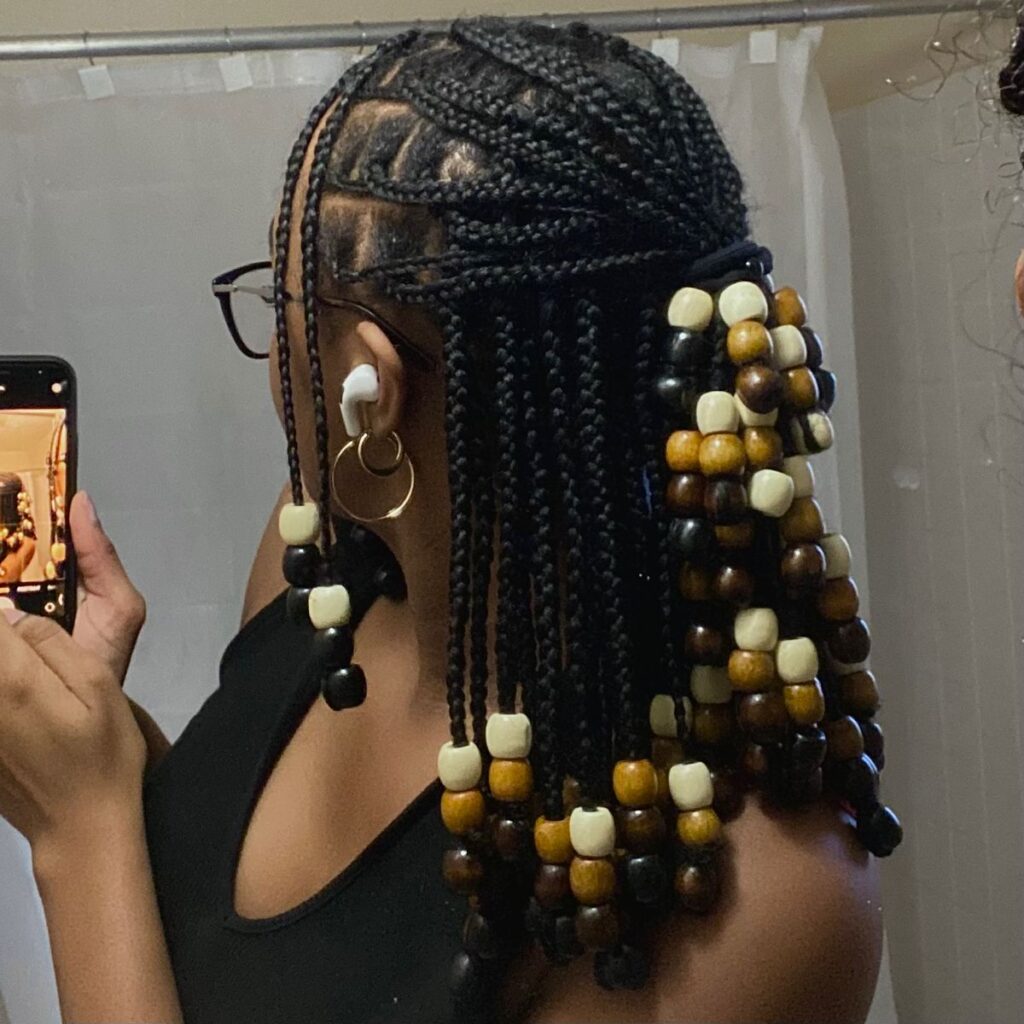
A braid can be flawless all the way down, but if the end looks messy, it kills the whole vibe. Secure the braid with a snag-free elastic and — here’s the pro touch — wrap a small piece of hair around the elastic to hide it, securing it with a discreet bobby pin or a dab of styling gel. For a more playful finish, you can add beads, ribbons, or cuffs, just like stylists do to elevate the final look.
These finishing touches are what separate “I braided it myself” from “I could charge for this.” Master them, and you’ll know how to braid hair like a pro in every sense of the word.
Finishing Touches That Make Braids Look Salon-Fresh
The difference between “just a braid” and “braid goals” is often in the final touches. When you’re learning how to braid hair like a pro, you can’t skip these polish steps — they’re the secret sauce that makes your work look like it belongs in a stylist’s portfolio.
Polishing Edges
Smooth edges frame the face and make your whole braid look neater. Use a soft-bristle brush or toothbrush with a little edge control gel to gently lay baby hairs in place. The key is subtlety — you want sleek edges, not a helmet of gel. For natural hair, choose an alcohol-free product that won’t flake or dry out the hairline.
Using Accessories
Accessories instantly upgrade your braid game. Gold hair cuffs, colorful elastics, satin ribbons, or decorative pins can take a braid from everyday to event-ready. Just remember — less is more. Choose accessories that match the vibe you’re going for, whether it’s elegant (think pearl pins) or playful (bright beads for festival season).
Locking in the Style with Spray or Mousse
Once your braid is perfect, lock it in so it survives the day — or the week. A lightweight hairspray works well for straight or wavy hair, while mousse is ideal for textured hair to keep frizz under control. Apply sparingly to avoid stiffness. For extra hold, lightly mist the hair before braiding as well, then finish with another quick spritz after.
When you add these final touches, your braids don’t just look salon-fresh — they last longer, photograph better, and get you more “Who braided your hair?” compliments than you can count. That’s the real win.
Perfect braiding is a mix of prep, technique, and those stylist-level finishing touches. Once you master how to braid hair like a pro, you’ll never have to book a salon appointment just to get flawless braids — unless you want to. Practice, polish, and soon your friends will be begging you to do theirs.
29 Protective Black Male Braids Hairstyles That Look Too Good